
AI-generated illustration
MODULE 4
Immobilisation
Collar, head immobiliser, spinal board, scoop, basket, splints and slings
PRINCIPLES OF IMMOBILISATION
- Prioritise life-threatening problems before immobilisation.
- Use MILS when cervical spine injury is suspected.
- Choose the device by suspected injury, player condition, environment and extraction plan.
- Minimise unnecessary movement during assessment, transfer and extrication.
- Explain the procedure to the player; coordinate all movement with one clear leader.
- Assess distal circulation, sensation and movement before and after limb immobilisation.
- Reassess ABC and neurological status after immobilisation and after every transfer.
ASSESS → STABILISE → IMMOBILISE → SECURE → REASSESS
CERVICAL COLLAR
The full colour-coded set piece for a suspected neck injury: MILS, assessment, collar, log roll or scoop and extrication.
Watch on FIFA's website (opens in a new tab)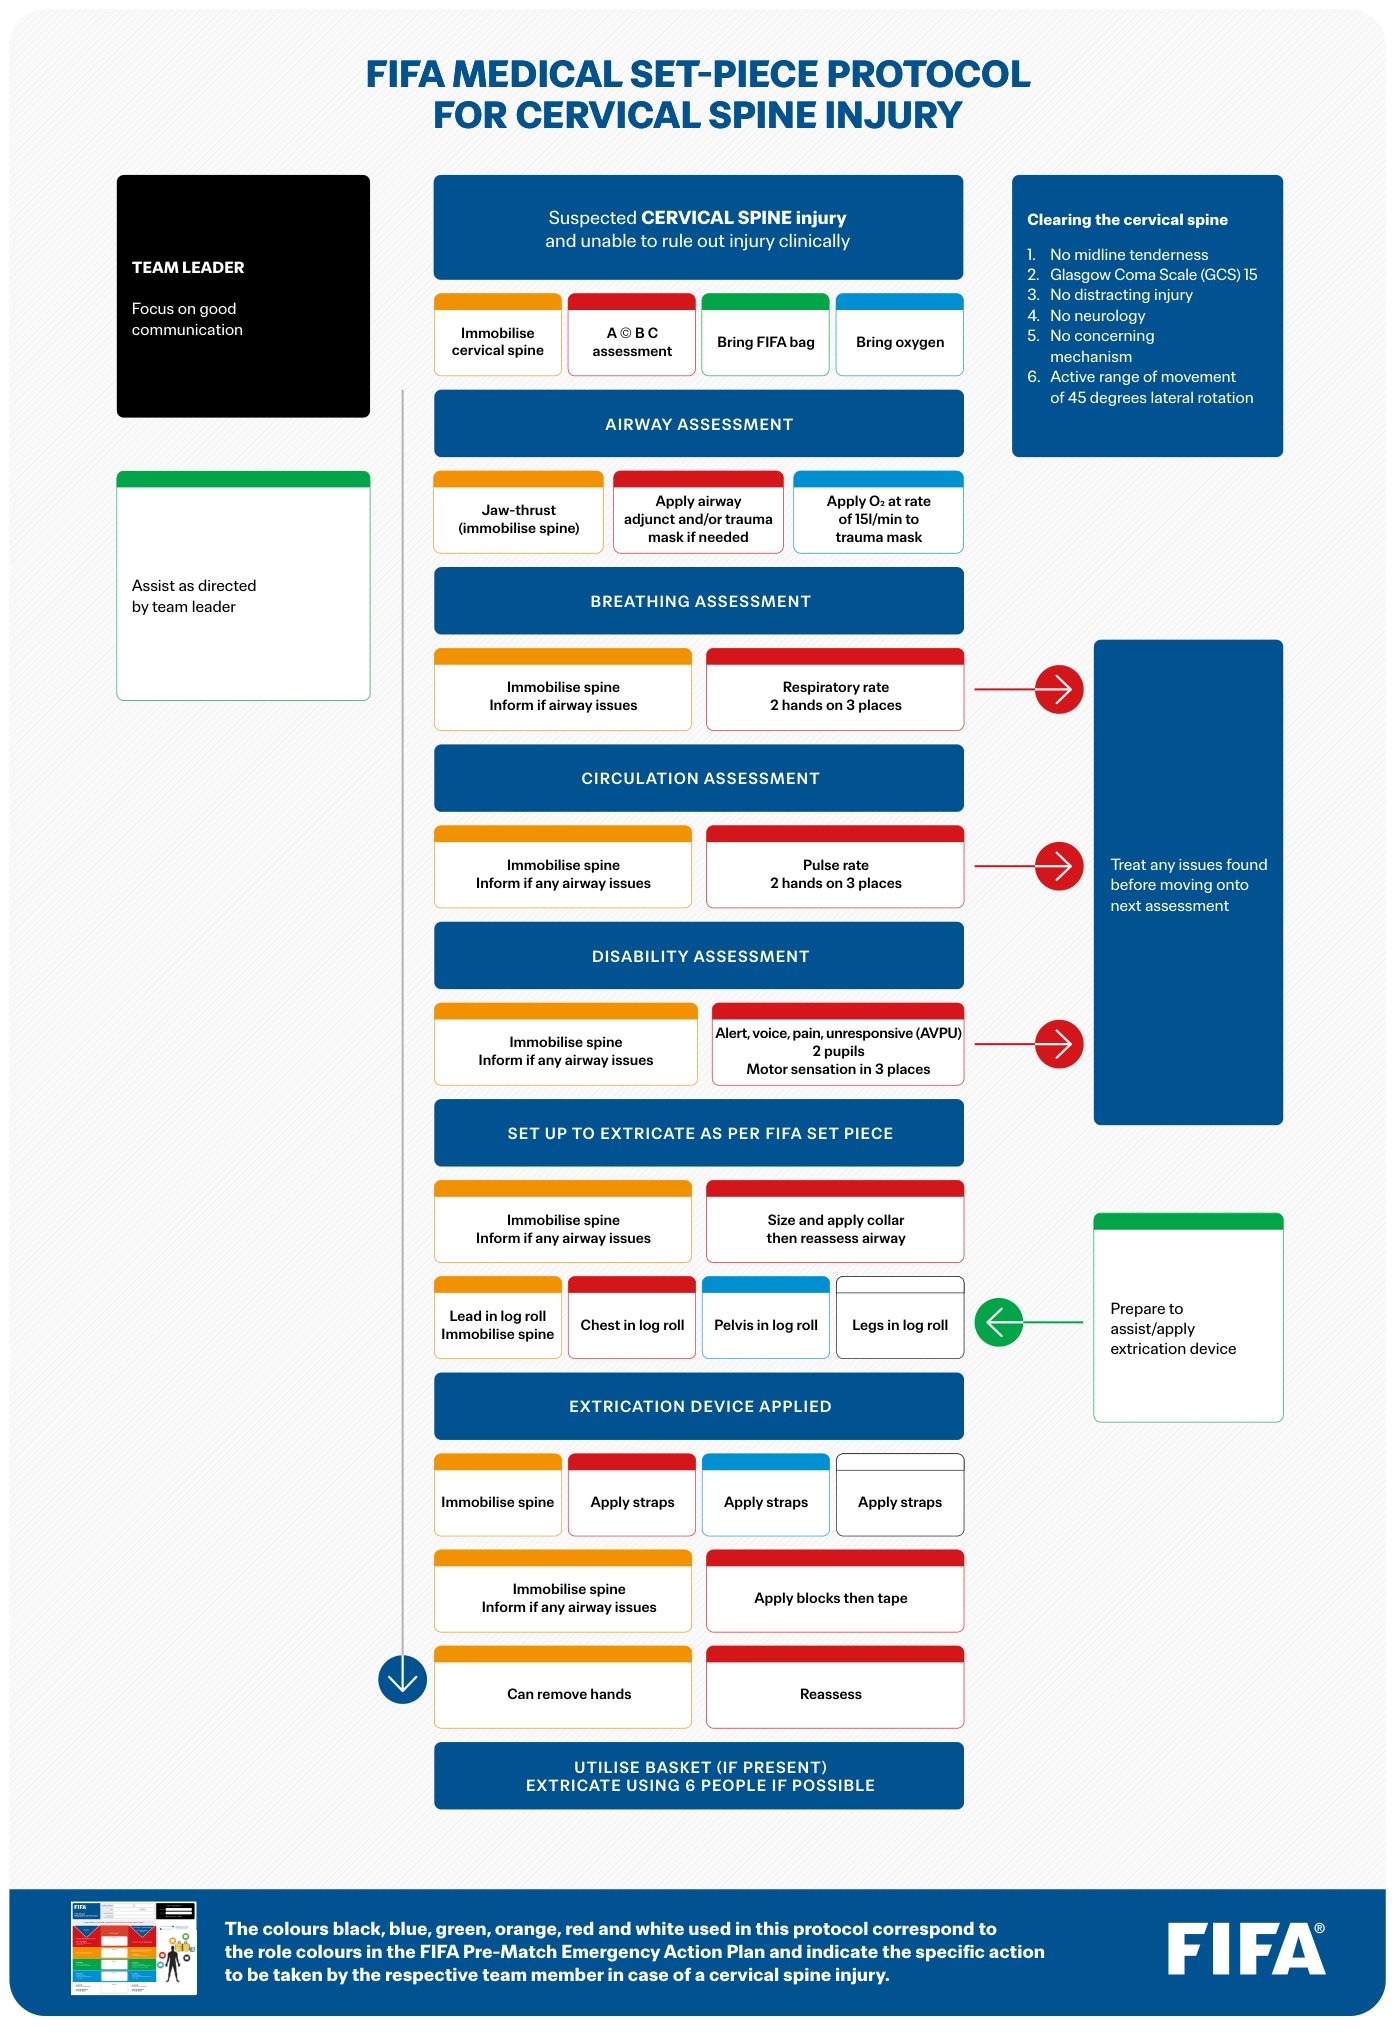
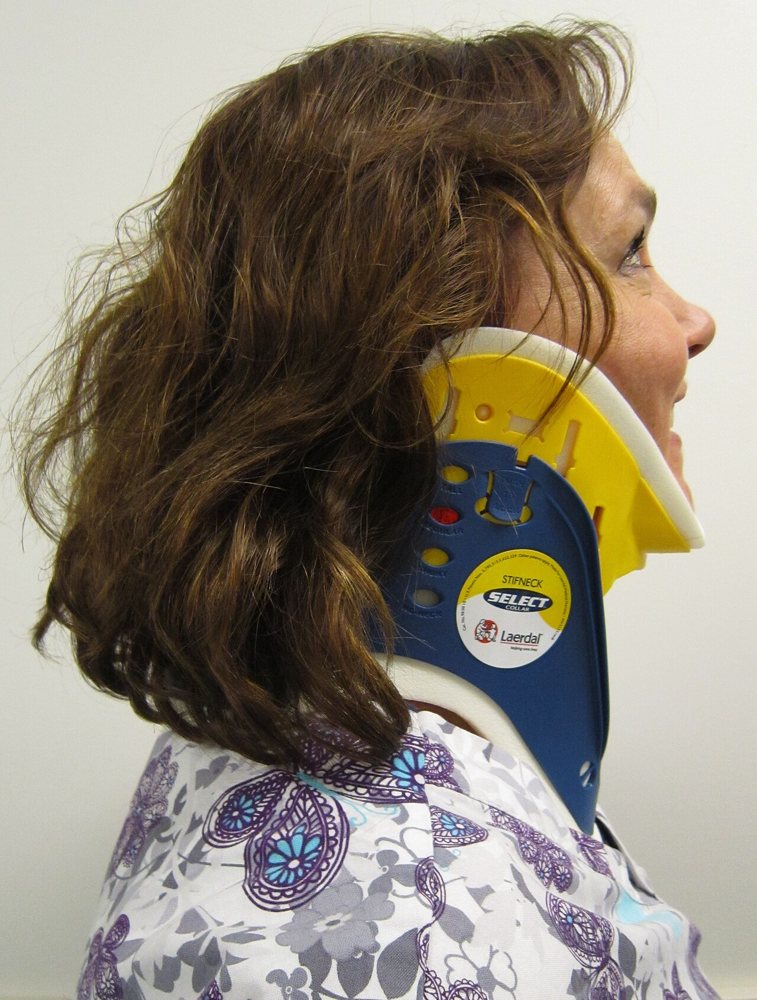
Restricts excessive cervical movement when the spine cannot be clinically cleared — midline tenderness, neurological deficit, altered mental status, intoxication or distracting injury.
- Maintain MILS throughout.
- Assess the neck and select the correct size.
- Prepare the collar before application.
- Position the posterior section; support the chin in the chin piece.
- Secure firmly without excessive tightening.
- Check the collar does not compromise airway or breathing.
- Continue spinal motion restriction; reassess neurological status.
MILS → ASSESS → SIZE → APPLY → SECURE → REASSESS
- FIFA sizing
- Neutral head: line from the chin back to the sternomastoid; measure fingerbreadths down to trapezius. Between two sizes → start SMALLER (too big extends the neck).
- FIFA contraindication
- Airway obstruction — keep MILS instead until the airway is dealt with.
- FIFA reminder
- A collar alone does not immobilise: keep MILS until blocks, tape and a device are on. Recheck the player after fitting. Follow local guidance — some countries no longer use collars.
HEAD IMMOBILISER
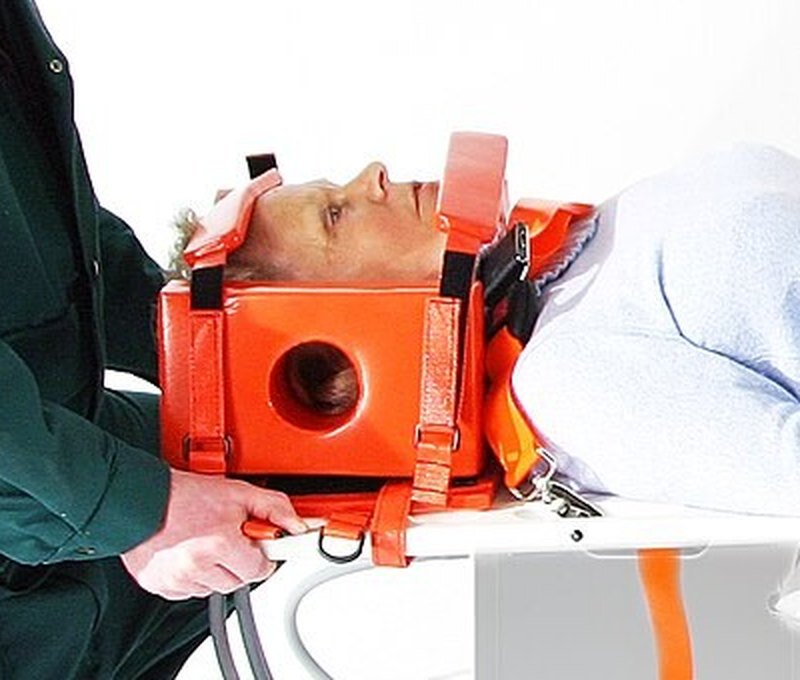
Lateral head support during spinal motion restriction and transport, used with an appropriate transfer device.
- Maintain manual head stabilisation until fully secured.
- Neutral position unless movement causes pain, resistance or neurological symptoms.
- Place the lateral blocks evenly.
- Secure forehead and chin straps per device design.
- Keep access to the airway and ears.
- Reassess airway and neurological status.
MANUAL CONTROL → BLOCKS → STRAPS → AIRWAY CHECK → REASSESS
SPINAL BOARD & SPIDER STRAP
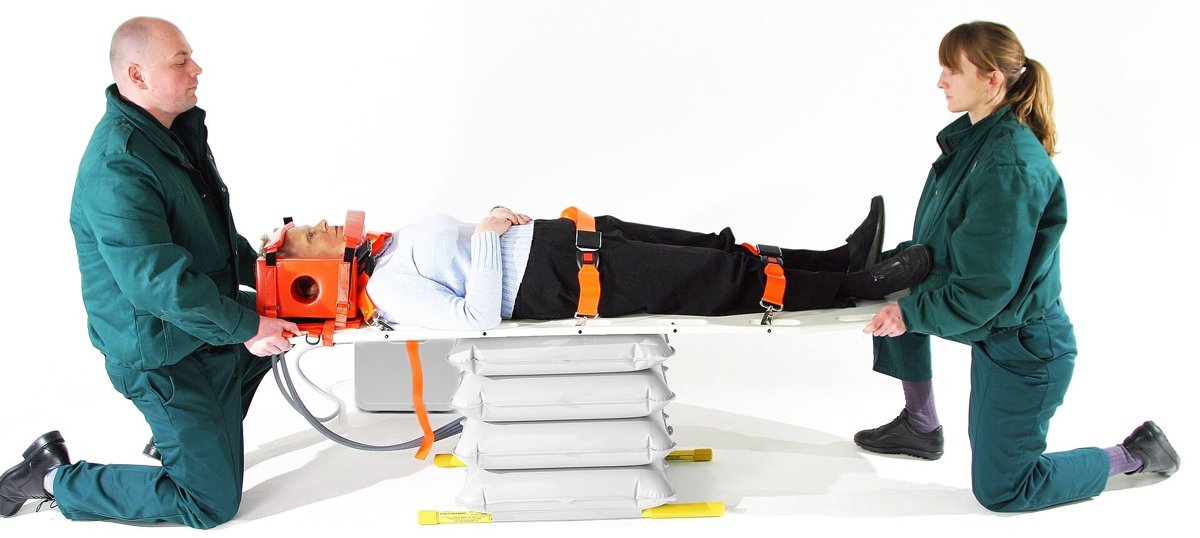
Rigid surface for controlled extrication or transfer; spider straps secure the torso, pelvis and lower limbs.
- The team leader coordinates; maintain spinal alignment.
- Position the player centrally.
- Secure torso and pelvis before the head, then the legs.
- Straps snug enough to control movement without impairing breathing or circulation.
- Secure the head last while manual stabilisation is maintained.
- Reassess ABC and neurological status.
BODY FIRST → LEGS → HEAD LAST → REASSESS
A scoop moves a trauma player only about 15°, compared with a 90° log roll. For cardiac arrest a rigid long board may give better compressions. A basket makes carrying a scoop or board safer.
- FIFA extrication order (suspected neck injury): size and fit the collar — check the mouth can still open.
- Move the player onto the scoop or spine board — Orange leads.
- Apply straps — the first, centre strap lined up with the sternum.
- Apply head blocks and fix them to the board, then tape.
- Only now can MILS be released.
- Slide the basket under the scoop and extricate with 6 people if possible.
LOG ROLL (FIFA SKILL ZONE)
- Head
- MILS. Controls the move: explains the signal and says how far (90° log roll vs 15–20° tilt for a scoop).
- Chest
- One hand on the player's far shoulder, one on the hip.
- Pelvis
- One hand on the waist, the other under the knee.
- Legs
- One hand under the lower leg, the other under the ankle.
- Fifth person
- Places the board / device.
Use for suspected spinal injury, reduced GCS with possible head / neck injury, extrication, or a vomiting player needing spinal precautions.
SCOOP STRETCHER
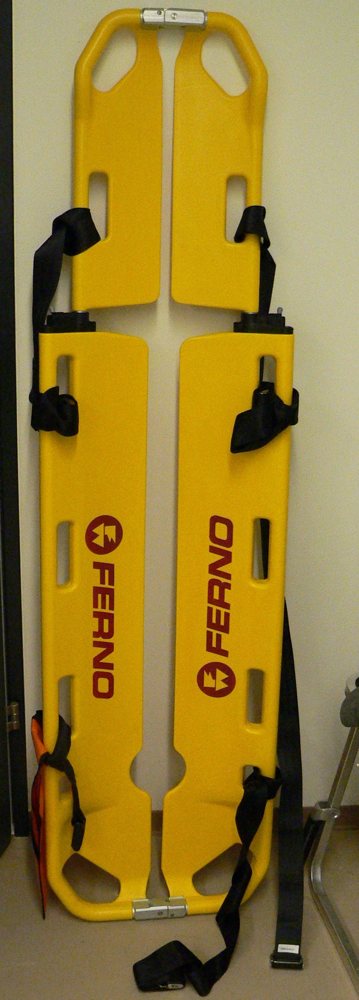
Lifting and transfer with reduced rolling — useful to move an injured player from the pitch to another transport device.
- Set up below the feet (FIFA): basket in line with the player, 2–3 basket lengths from the feet; scoop out of the basket, extended and split, laid between the feet and the basket.
- Adjust length to the player.
- Separate the two halves.
- Position each half alongside with minimal movement.
- Connect head and foot ends securely.
- Check all locks before lifting.
- Enough rescuers; lift on the team leader's command.
- Reassess after transfer.
SIZE → SPLIT → POSITION → LOCK → CHECK → LIFT
BASKET STRETCHER
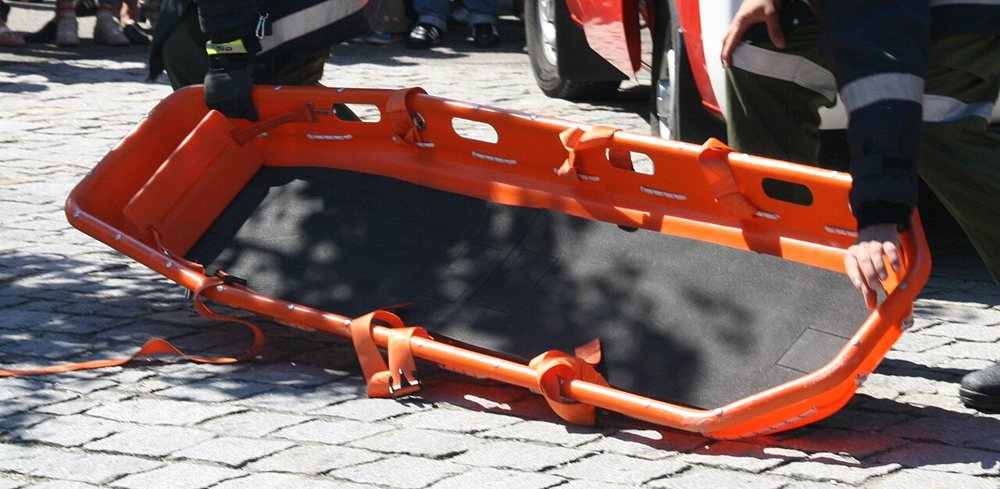
Protected carrying platform for difficult terrain or longer manual carries — stairs, slopes or poor pitch access.
- Set up below the feet (FIFA): basket in line with the player, 2–3 basket lengths from the feet, scoop or board laid out between them.
- Transfer the player into the basket with an appropriate technique / device.
- Position centrally.
- Secure torso, pelvis and legs.
- Check straps and handles before movement.
- Adequate personnel and coordinated commands.
- Monitor the player continuously.
TRANSFER → CENTRE → SECURE → CHECK → CARRY → MONITOR
LIMB SPLINTS
Assessing and splinting a lower-limb injury on the pitch before extrication.
Watch on FIFA's website (opens in a new tab)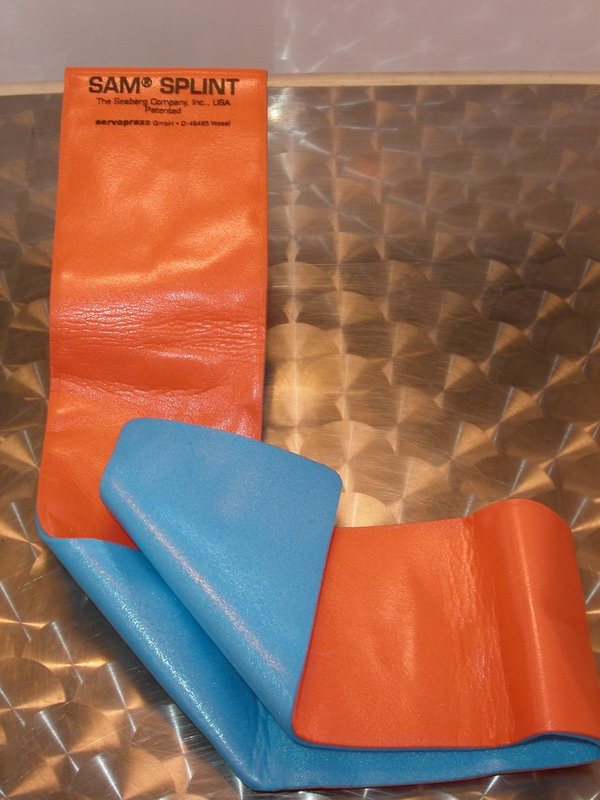
- Expose and inspect the injured limb where appropriate.
- Control significant bleeding before splinting.
- Check distal circulation, sensation and movement (CSM).
- Immobilise the joints above and below the suspected fracture when practical.
- Pad voids and bony prominences.
- Secure without excessive pressure.
- Recheck CSM.
CSM BEFORE → SPLINT → SECURE → CSM AFTER
EXTREMITY FRACTURE (FIFA PROTOCOL)
Any extremity fracture is a distracting injury — always do the full primary survey (A–E) and clear or protect the cervical spine first.
- Stabilise the limb: one hand above and one below the fracture.
- Inspect: swelling, deformity, bruising, wound. Feel: tenderness, crepitus, pulses and sensation. Active, then passive movement.
- Analgesia — FIFA suggests inhaled methoxyflurane where available.
- Wounds: clean thoroughly, cover with saline-soaked swabs and dress.
- Apply the splint, then recheck circulation and neurology.
- Open fracture (a wound over or near the break): refer to hospital; early antibiotics are advisable.
- Extricate — or, if there is no neck injury and the player can help, assist them into the basket stretcher.
ARM SLING
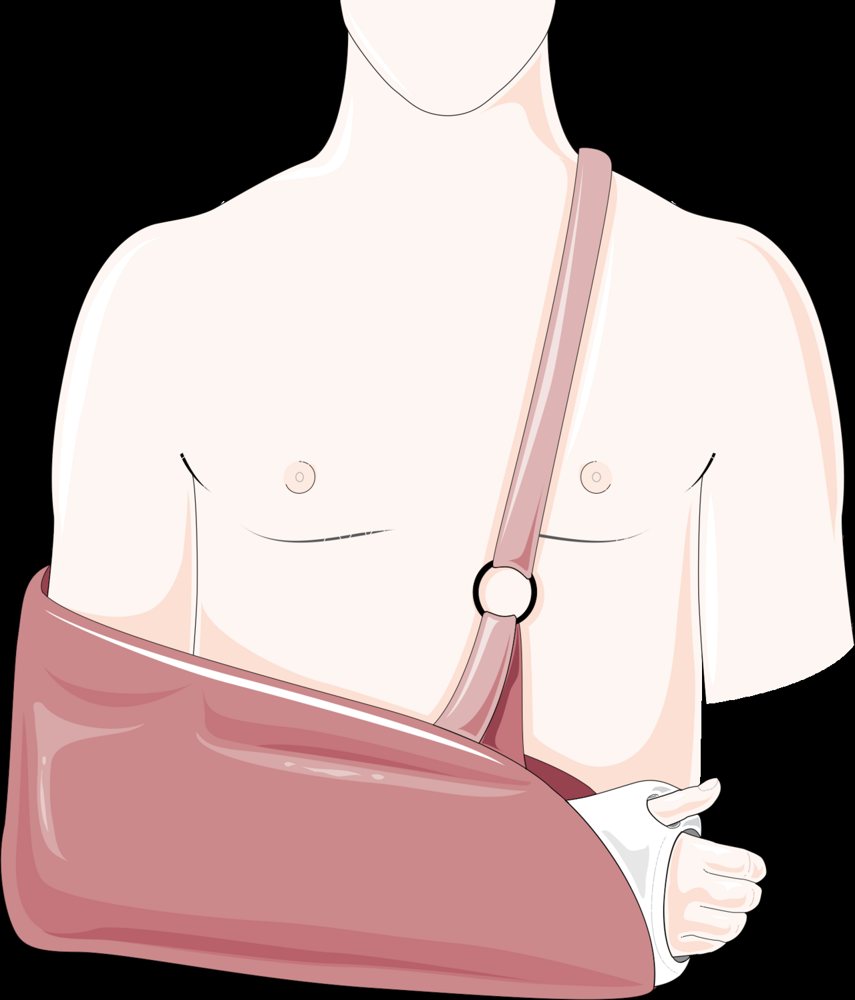
- Support the injured arm while applying.
- Forearm comfortably across the chest.
- Sling under the forearm, secured around the neck.
- Keep the hand visible for circulation checks.
- Reassess CSM.
SUPPORT → SLING → SECURE → CSM CHECK
T-SHIRT ARM SLING (IMPROVISED)
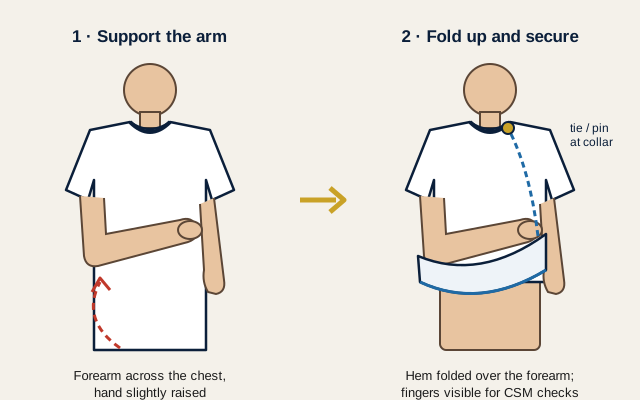
- Use when no conventional sling is available or rapid pitchside support is needed.
- Support the arm against the torso.
- Use the lower part of the player's shirt to support the forearm.
- Secure without restricting breathing or circulation.
- Avoid manipulating a suspected fracture or dislocation.
- Reassess CSM.
SUPPORT → FOLD / SECURE → COMFORT → CSM CHECK
PITCHSIDE SCENARIOS
A · Suspected cervical spine injury
Collision; on the ground with neck pain or neurological symptoms
- Approach safely; primary survey.
- Initiate MILS. Do not let the player sit or stand unnecessarily.
- If the spine cannot be cleared: spinal motion restriction and controlled extrication (scoop stretcher + basket).
- Repeat ABC and neurological reassessment.
B · Suspected lower-limb fracture
Severe pain, swelling or deformity after a tackle
- Primary survey; control bleeding.
- Check CSM, support and splint, recheck CSM.
- Scoop stretcher + basket for removal from the pitch — both set up below the feet, in line with the player.
C · Upper-limb injury
Isolated shoulder / arm injury, otherwise stable
- Assess the area and distal neurovascular status.
- Arm sling or T-shirt sling.
- Reassess comfort and circulation before transfer.
COMMON MISTAKES TO AVOID
- Applying equipment before an appropriate primary assessment.
- Releasing MILS too early.
- Incorrect collar sizing.
- Uncoordinated lifting without a clear leader.
- Straps too loose or too tight.
- Moving a suspected fracture to get a 'normal' position.
- Not checking CSM before and after splinting.
- Not reassessing ABC and neurology after immobilisation or transfer.
Device-specific manufacturer instructions and your local clinical protocol take precedence where applicable.
Source: FIFA Emergency Care Manual: collar sizing, log roll and the extrication set piece. The step lists for each device and the sling techniques are general practical guidance; always follow the manufacturer's instructions. Study aid only — follow FIFA's current documents and your local protocol.